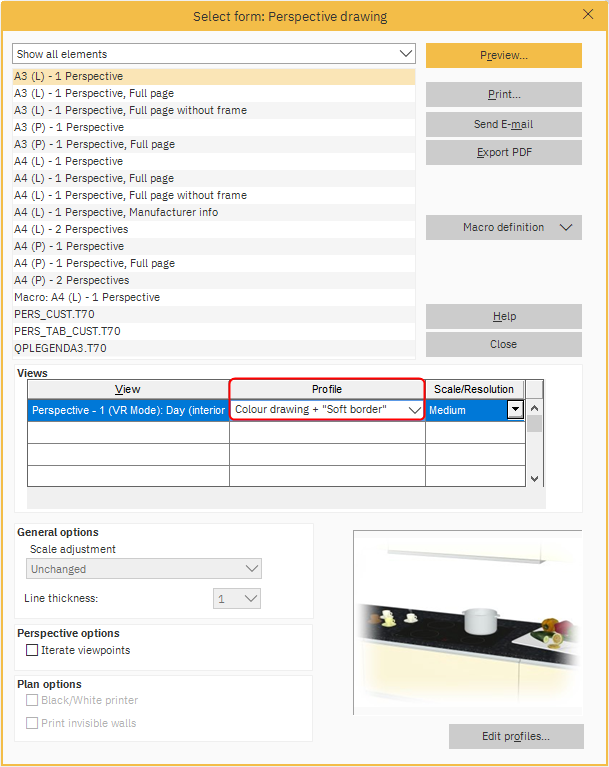
In Winner, users' graphical printouts can include an image of the Perspective view. Users can set up an image filter for the perspective view which will have a shadow border or soft border. As an example, a perspective view image with a soft border can be seen below:
Applying an image filter
At Alternative level:
- Right-click the Perspective view window and select Perspective > Print Perspective.
- In the Select form: Perspective drawing window, in the Views section, click the Profile drop-down menu and select a profile with "Soft border" or "Shadow border".

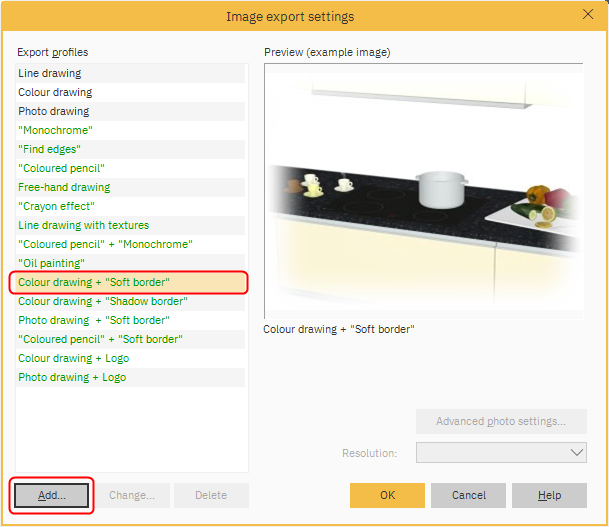
Note: To customise the image filter, click Edit profiles. - To print a hardcopy, click Print.
To export the view as a PDF, click Export PDF.
To send the view via email, click Send E-mail.
Note: Click the Preview button to see a preview of the view in the selected format.
Customising the image filter
- In the Image export settings window, click Add.

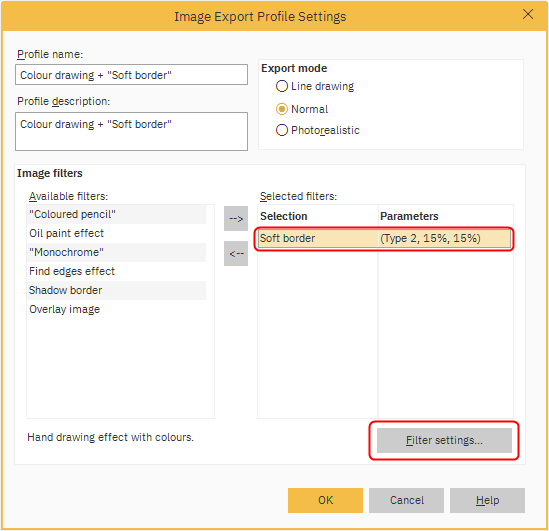
Note: The Profile selected by the user in the Select form: Perspective drawing window should automatically be highlighted, for example Colour drawing + "Soft border". - In the Image export profile settings window, in the Image filter section under Selected filters, select the existing filter, for example Soft border, and click Filter settings.

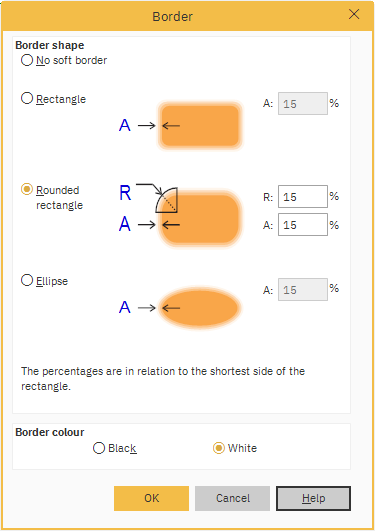
- The Border window will open.

In the Border window, users can:- Border shape - select the shape of the border.
- No soft border - select this if you do not want any border around the perspective drawing.
- Rectangle - draw a border in the form of a rectangle around the perspective drawing.
- Rounded rectangle - draw a border in the form of a rectangle with rounded corners around the perspective drawing.
- Ellipse - draw a border in the form of an ellipse around the perspective drawing.
- A % - specify the percentage of the drawing that constitutes the border.
- R % - specify radius for the rounding off of the corners.
- Border colour - select colour on the border.
- Once finished, click OK.
- In the Image export profile settings window, enter a new name in the Profile name field and click OK.
- In the Image export settings window, with the new export profile selected, click OK.
Note: The new, user created export profile text will be in blue. - In the Select form: Perspective drawing window, users can now print, e-mail, export as a PDF or preview the customised perspective view image.
Related articles
